Views: 0 Author: Site Editor Publish Time: 2026-08-01 Origin: Site
High return rates and customer complaints regarding fit are rarely caused by a bad initial design; they are almost always the result of poor size grading and uncalibrated print scaling across the production run. A sample garment approved in a size Medium does not naturally translate to an XS or a 3XL. Without mathematical pattern grading, independent component adjustments, and print scaling, garments lose their intended proportions. This results in distorted fits, misplaced graphics, costly reprints, and compromised brand integrity.
To produce retail-ready apparel, buyers must evaluate how manufacturing partners handle pattern adjustments, digital CAD nesting, fabric tolerances, and print scaling. This guide breaks down the technical realities of size grading to help you spec, evaluate, and source inventory that fits consistently across every size. We will look at the exact mechanics of pattern adjustments and how material behavior dictates the final cut.
Grading is Non-Linear: Human bodies do not scale in perfect fractions. Proper grading requires independent adjustments to specific points of measure (POM) like armholes, neck drops, and shoulder slopes.
Fabric Dictates the Grade: The structural integrity of the fabric—such as the rigidity of Heavyweight T-Shirts versus the stretch of tri-blends—requires different grading rules and shrinkage tolerances.
Independent Piece Adjustment is Essential: Pockets, sleeves, collar bands, and plackets must be graded independently of the body pattern to preserve visual balance.
Print Sizing Directly Impacts ROI: A 10-inch graphic that looks balanced on a Medium will overwhelm a Small and look lost on an XXL. Proper print scaling and placement trends are critical to reducing customer returns and expensive reprints.
Vendor Evaluation Requires Full Size Runs: Never approve a bulk order based on a single medium sample. Evaluating a full size run (or at least the extreme ends of the spectrum) is a mandatory risk mitigation step.
Defining what constitutes a consistent fit across a brand demographic requires strict success criteria. Success means the garment drapes and functions identically on a size Small as it does on a size XXL. Achieving this requires precise mathematical adjustments across both the X and Y axes of a digital pattern. Base sizes, usually a Medium or Large, serve as the anchor point for grading up and grading down. You cannot simply scale a pattern up by five percent across the board and expect it to fit a human being properly.
Standard grading applies even increments between sizes. Complex grading adjusts proportions specifically for plus sizes to accommodate different body mass distribution. For example, the jump from Large to XL might require a one-inch increase in chest width, while the jump from 2XL to 3XL might require a two-inch increase to accommodate a wider torso without adding unnecessary length. This non-linear approach prevents the garment from turning into a dress on larger individuals.
The technical tools of the trade have evolved significantly over the last two decades. Grading has transitioned from manual pattern shifting using physical grading rulers to advanced digital CAD systems. A critical component of this digital workflow is the grading nest. By using nested pattern files, where all sizes are stacked visually on a single screen, pattern makers can detect mathematical scaling errors before any fabric cutting begins. You can physically see if the armhole curve suddenly spikes or flattens out incorrectly on the 2XL line.
Linear scaling fails across a full size run due to anatomical realities. As bodies get larger, they primarily gain width and depth, not necessarily height. If manufacturers simply apply a flat percentage increase to all dimensions, the result is often "tenting" in large sizes or restricted arm mobility in smaller sizes. Proper grading for Custom T-Shirts requires independent adjustments to ensure the garment moves naturally with the wearer, regardless of their position on the size chart.
Consider the specific points of measure that dictate comfort. The cross-shoulder measurement does not grow at the same rate as the chest circumference. If you grade the shoulders out too far on an XL, the shoulder seam drops down the arm, creating a sloppy appearance. If you do not grade the armhole depth enough, the fabric bites into the armpit. These micro-adjustments separate premium apparel from cheap promotional wear.
| Point of Measure (POM) | Standard Grade (S to M) | Plus Size Grade (2XL to 3XL) | Common Linear Scaling Error |
|---|---|---|---|
| Chest Width | + 1.0 inch | + 2.0 inches | Applying +1.0 inch uniformly, causing tight fits on 3XL. |
| Body Length | + 1.0 inch | + 0.5 inch | Adding +1.0 inch to 3XL, resulting in a dress-like fit. |
| Cross Shoulder | + 0.5 inch | + 0.75 inch | Over-extending the shoulder seam down the bicep. |
| Armhole Depth | + 0.25 inch | + 0.5 inch | Keeping armholes too tight on larger sizes, restricting movement. |
When reviewing a tech pack, pay close attention to the grade rules applied to the neck drop. The front neck drop determines how low the collar sits below the collarbone. If this measurement scales up too aggressively, larger sizes will suffer from a gaping, sloppy neckline. Conversely, if it does not scale at all, the collar will choke the wearer. Pattern makers must strike a delicate balance, usually increasing the neck drop by mere fractions of an inch (e.g., 1/8th or 1/4th of an inch) between sizes.
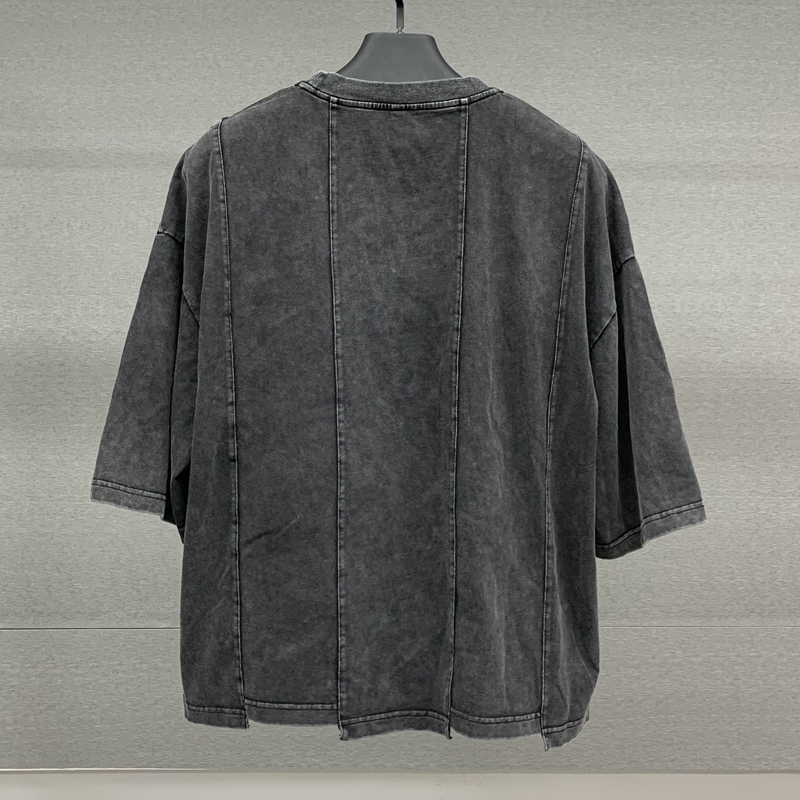
Specific pattern adjustments translate directly to the end-user experience and play a major role in reducing return rates. Grading the entire shirt silhouette as a single flat block is a common mistake that leads to disproportionate garments. Independent component grading is necessary. For example, sleeves require adjusting the sleeve cap height, the armhole curve (scye), and the sleeve opening independently. This maintains a full range of motion without creating excess fabric bunching under the arm.
Collars and pockets also demand independent attention. Grading rules must prevent pockets from becoming disproportionately massive on 3XL shirts or neck openings from gaping on larger builds. A chest pocket that looks perfectly placed on a size Medium will look completely lost and too close to the center front on a 3XL if the placement is not graded outward along with the chest width.
Maintaining the visual shape and design intent—whether it is a semi-fitted, oversized, or athletic cut—from XS to 3XL is the essence of silhouette preservation. You want to ensure that an athletic-cut garment does not degrade into a wide, boxy square at the upper end of the size spectrum. The side seams must retain their intended angle. If an athletic shirt features a slight taper at the waist, that taper must be mathematically preserved across the entire size run, adjusting the waist-to-hip ratio accordingly.
Establishing the correct grade rules for body length involves understanding torso length versus width ratios. A common manufacturing flaw occurs when graded-up shirts become disproportionately long rather than accommodating wider circumferences. Properly engineered Private Label T-Shirts balance these ratios, ensuring the hem falls at the correct point on the hip across all sizes. You do not want your 2XL customers sitting on the back hem of their shirts.
Review the sleeve cap height on the nested pattern to ensure it does not flatten out on larger sizes.
Measure the front neck drop progression to prevent gaping collars on 2XL and 3XL garments.
Verify that pocket placement scales outward from the center front line as the chest width increases.
Check the sweep (bottom hem width) to ensure it accommodates the hips without flaring out unnaturally.
Another critical area is the shoulder slope. Human shoulders naturally slope downward from the neck to the arm joint. If the grading process alters this angle, the shirt will pull tightly across the collarbones or bunch up near the neck. The shoulder slope must remain relatively consistent across the size run, even as the cross-shoulder width expands. This requires precise X and Y coordinate mapping in the CAD software.
When evaluating a factory's capability, ask them how they handle the armhole curve. The scye (the curve of the armhole) is notoriously difficult to grade correctly. If the curve becomes too shallow on smaller sizes, it restricts forward arm movement. If it becomes too deep on larger sizes, it creates a batwing effect. A skilled pattern maker will adjust the curve's control points independently, rather than just scaling the entire shape.
Material selection forces necessary adjustments in the grading tech pack. The structural integrity and drape of the fabric dictate how the garment will behave once cut and sewn. You cannot use the exact same paper pattern for a rigid cotton canvas as you would for a modal blend. The fabric's physical properties demand specific grading interventions.
The lack of mechanical stretch in Heavyweight T-Shirts requires slightly more generous grading increments in high-tension areas like the chest, shoulders, and armpits to maintain comfort. Because the thick yarn does not yield easily to body movement, the garment must provide enough physical ease built directly into the pattern. If you grade a heavyweight shirt too tightly, the wearer will feel restricted across the upper back when reaching forward.
Conversely, lightweight, high-stretch fabrics can utilize tighter grading rules due to the inherent forgiveness of the material. A fabric with five percent spandex will stretch to accommodate the body, allowing for a closer, more tailored fit without sacrificing mobility. The grading increments between sizes can be slightly smaller because the fabric itself bridges the gap.
Shrinkage tolerances must be factored into the grading process long before production begins. Wash-shrinkage affects different sizes disproportionately. For instance, a 100% cotton blank requires graded shrinkage tolerances because a 5% shrinkage on a 3XL garment removes significantly more physical inches than a 5% shrinkage on an XS garment. Pattern makers must calculate these variations and adjust the initial cut dimensions accordingly to ensure the post-wash fit remains accurate.
| Garment Size | Pre-Wash Chest Width | 5% Shrinkage Loss | Post-Wash Target Width |
|---|---|---|---|
| Small | 19.0 inches | - 0.95 inches | 18.05 inches |
| Large | 22.0 inches | - 1.10 inches | 20.90 inches |
| 2XL | 26.0 inches | - 1.30 inches | 24.70 inches |
| 4XL | 30.0 inches | - 1.50 inches | 28.50 inches |
Notice how the 4XL loses a full inch and a half, while the Small loses less than an inch. If the factory applies a flat one-inch shrinkage allowance across all sizes, the Small will end up too big, and the 4XL will end up too tight after the first wash. The pattern must be engineered with a graded shrinkage allowance, meaning the cut pattern for the 4XL is intentionally oversized by 1.5 inches, while the Small is only oversized by 0.95 inches.
Fabric drape also impacts the perceived length of the garment. A heavy, stiff fabric will stand away from the body, making the shirt appear shorter. A soft, drapey fabric will cling and pull downward due to gravity, making the shirt appear longer. When grading body length, the pattern maker must account for the fabric's weight and how it will hang on the body. This is why a tech pack must always specify the exact fabric weight in GSM (grams per square meter) before grading begins.
Addressing the visual disconnect between the garment size and the embellishment is critical to eliminating reprints and returns. The one-size-fits-all print fallacy carries significant aesthetic and financial risks. Using a single screen or file size for an entire run distorts the perceived fit of the garment. A static chest logo might inch toward the armpit on smaller sizes or migrate awkwardly to the center chest on larger sizes.
Establishing print grading rules for XS to 3XL involves creating distinct print size tiers. Calculating the distance from the collar for placement grading ensures the graphic sits on the visual center of the chest across all sizes. While there are cost trade-offs regarding the setup costs of multiple screens, these are easily offset by the retail value and margin protection of properly scaled designs. You cannot put a 12-inch wide graphic on a size Small shirt; it will wrap around the ribcage and disappear under the arms.
To execute this correctly, production managers divide the size run into logical tiers. Tier 1 covers the smallest sizes, Tier 2 covers the core middle sizes, and Tier 3 covers the plus sizes. Each tier requires its own set of screens or digital print files. Furthermore, the vertical placement of the graphic must drop lower on the chest as the shirt size increases. A logo placed two inches below the collar on a Small will look like a neck tattoo on a 3XL.
Tier 1 (XS - S): Requires a scaled-down graphic width to prevent the design from wrapping around the torso.
Tier 2 (M - XL): Utilizes the standard base size graphic, optimized for the core demographic.
Tier 3 (2XL - 4XL): Requires a scaled-up graphic to prevent the design from looking like a tiny postage stamp on a large canvas.
Vertical Placement: The distance from the bottom of the collar to the top of the graphic must increase by roughly 0.5 inches per tier.
Consider the impact on full-front graphics versus left-chest logos. A left-chest logo must also move outward toward the armhole as the shirt size increases. If the logo stays locked at four inches from the center front line, it will look perfectly placed on a Medium but will appear cross-eyed and too close to the sternum on a 3XL. The X-axis placement must be graded just like the physical fabric pattern.
When working with water-based inks or discharge printing, the size of the graphic also affects the drape of the fabric. A massive, heavy plastisol print on a small shirt will create a stiff "bulletproof" shield on the chest, ruining the garment's drape and comfort. Scaling the print down for smaller sizes reduces the ink deposit area, preserving the fabric's natural hand feel and flexibility.
Vetting suppliers based on their technical grading capabilities requires a strict decision framework. You must ask specific questions about their grading systems to ensure they meet your quality standards. Determine if they use standard algorithmic grading or demographic-specific grade rules tailored to your target audience. Request to see digital nested patterns (CAD files) for review, and ask for their acceptable manufacturing tolerances, typically measured in fractions of an inch per Point of Measure.
Sampling requirements before bulk production are non-negotiable. Ordering a jump size sample run—such as a Small, Large, and 2XL—verifies the grading logic before you commit to bulk manufacturing. Once these samples arrive, audit them against your tech pack using a tape measure and standard QA protocols. Verify that the print scaling and placement trends align with your specifications and that the silhouette remains consistent across the extreme ends of the size spectrum.
When auditing the samples, lay the garments completely flat on a smooth table. Smooth out any wrinkles without stretching the fabric. Measure the chest width exactly one inch below the armhole seam. Measure the body length from the high point shoulder (HPS) straight down to the bottom hem. Compare these physical measurements against the graded spec sheet provided by the factory. If the measurements fall outside the acceptable tolerance (usually +/- 0.5 inches), the factory has a cutting or sewing control issue.
Request the factory's standard grade rule manual before signing any agreements.
Demand a digital copy of the nested pattern to visually inspect the armhole and neck drop curves.
Specify your exact shrinkage tolerances in the tech pack and require the factory to engineer the pattern accordingly.
Order a jump size sample run (e.g., S, L, 2XL) to physically verify the grading execution.
Conduct a wash test on the samples to confirm the post-wash measurements align with your target specs.
Communication is the final piece of the puzzle. A reliable manufacturing partner will push back if your requested grade rules do not make sense for the chosen fabric. They should act as technical advisors, not just order takers. If you request a zero-tolerance spec on a highly elastic fabric, a good factory will explain why that is physically impossible and suggest a realistic tolerance range. Build relationships with vendors who understand the mathematics of apparel production.
Size grading dictates product viability, customer satisfaction, and brand reputation. It requires precise mathematical adjustments, an understanding of fabric behavior, and strict quality control protocols. By mastering these technical realities, you can source inventory that fits consistently across every size.
Audit your current tech packs to ensure independent component grading is specified for sleeves, collars, and pockets.
Request a full size run sample or a jump size run from your shortlisted vendors to physically verify their mathematical scaling.
Establish clear print-to-garment ratio guidelines and create distinct print size tiers before issuing your next purchase order.
Define strict manufacturing tolerances (+/- inches per POM) and enforce them during your quality assurance inspections.
A: Typically, the industry standard is a 1-inch to 2-inch increase in chest circumference and a 0.5-inch to 1-inch increase in body length per size. This varies heavily based on the target demographic, the specific fit style, and the fabric's mechanical stretch properties.
A: A nested pattern is a visual overlay of all garment sizes in a size run stacked on top of one another. This allows pattern makers to review the visual progression of the grade rules and identify sudden, disproportionate jumps before cutting fabric.
A: Yes, using a single screen size across a full size run often results in graphics that look too large on an XS and too small on a 3XL. Creating two or three print size tiers ensures proportional balance and maintains the intended aesthetic.
A: Fabrics with high mechanical stretch, like tri-blends, are more forgiving and can utilize tighter grading rules. Rigid fabrics require more generous grading increments to ensure the wearer maintains a full range of motion without feeling restricted.
A: This happens when manufacturers apply a flat linear grade rule to both width and length. Human bodies generally gain more width than height as sizes increase, so length grading should taper off in larger sizes to prevent a dress-like fit.
A: A jump size sample run involves ordering non-consecutive sizes, such as Small, Large, and 2XL. This allows you to test the accuracy of the manufacturer's grading rules across the entire spectrum before approving bulk production.


