Views: 0 Author: Site Editor Publish Time: 2026-07-23 Origin: Site
Approving a pre-production sample represents the most critical phase in apparel sourcing. A single physical prototype dictates the exact outcome of your entire bulk manufacturing run. Many buyers treat this sample approval as a simple visual check. They look at the color, glance at the logo placement, and give the factory the green light. This superficial approach directly causes massive bulk rejections. You will inevitably face severe shrinkage, incorrect fabric weight, or out-of-tolerance measurements upon delivery if you skip technical validation.
You must treat the pre-production sample as a rigorous technical audit. It requires a standardized, evidence-based evaluation framework. You need to verify that the physical garment matches your exact technical specifications down to the millimeter. This ensures bulk production aligns perfectly with your brand standards. By implementing a strict audit process, you eliminate factory guesswork. You protect your production timeline and prevent manufacturing errors long before bulk cutting begins.
Verify Technical Specs Over Aesthetics: Always validate GSM, fabric composition, and dimensional tolerances against the original tech pack before assessing visual design.
Stress-Test the Sample: A PPS must undergo wash testing, stretch testing, and hardware evaluation to predict post-purchase durability and shrinkage.
Document Every Revision: Verbal approvals are a liability; all discrepancies must be documented in a revised tech pack and signed off before bulk production begins.
Establish the "Golden Sample": The approved PPS becomes the binding legal and physical standard for third-party Quality Control (QC) inspections during the Top of Production (TOP) phase.
The pre-production sample serves as the final prototype before mass manufacturing commences. It differs entirely from initial fit samples, size runs, or photo samples. Fit samples often utilize available substitute fabrics just to check pattern grading and drape. Photo samples might lack final interior labels or use temporary hardware for marketing shoots. The pre-production sample uses actual bulk materials. Factories create it using the exact machinery, operators, and assembly line processes planned for your main order.
This sample acts as your last line of defense. Once you approve it, the factory orders bulk fabric, dyes the yardage, and begins cutting panels. Any error missed at this stage multiplies across thousands of units. You must evaluate this sample as the definitive standard for your production run. To understand where it fits, look at the standard sampling progression.
| Sample Type | Purpose | Materials Used | Approval Action |
|---|---|---|---|
| Fit Sample | Verify pattern grading and silhouette. | Available substitute fabric (similar weight). | Adjust pattern measurements. |
| Photo Sample | Marketing and catalog photography. | Close-match fabric, temporary trims. | Internal marketing use only. |
| Pre-Production Sample (PPS) | Final technical audit before bulk. | Actual bulk fabric, final trims, exact dye. | Authorize bulk cutting and sewing. |
| Top of Production (TOP) | Verify bulk matches the approved PPS. | Pulled directly from the bulk assembly line. | Authorize final shipment and container loading. |
Sample approval cycles directly impact your supply chain logistics. Brands using a pre-order model face strict delivery deadlines. Customers expect their garments within a specific, advertised window. Brands utilizing pre-made inventory drops need stock ready in the warehouse before marketing campaigns launch. Both distribution models require precise timing and zero delays.
You must establish a realistic buffer timeline. Allocate two to four weeks for sample shipping, physical review, wash testing, and potential revisions. Rushing this phase to meet a launch window often compromises quality. A proper buffer protects your product launch and ensures you never approve a flawed sample out of desperation. Follow a strict timeline protocol for sample review.
Log the sample receipt date and immediately review the packing slip against the tech pack.
Conduct the dry measurement and visual inspection within 24 hours of receipt.
Perform the wash test, dry cycle, and post-wash measurement on day two.
Compile the feedback report with annotated photos and send it to the factory by day three.
Allow five to seven days for the factory to acknowledge feedback and implement pattern corrections.
Approving a flawed sample creates cascading financial losses. You risk receiving unsellable inventory that fails quality control upon arrival. Delayed launch windows damage your brand reputation and frustrate loyal customers. End consumers will return garments that shrink excessively or fit poorly after one wash. The costs extend far beyond the initial manufacturing invoice, factoring in reverse logistics, customer service overhead, and lost marketing spend.
The approved sample serves as your contractual baseline. It holds the manufacturer accountable during dispute resolution. If the bulk order deviates from this physical standard, you have grounds for rejection and chargebacks. Without a meticulously audited sample, you lose your leverage in quality control disputes. The factory will simply claim they followed your vague approval.
Fabric weight determines the drape, warmth, and durability of your garment. You must verify the Grams per Square Meter (GSM) accurately. Do not rely on the factory's stated weight on the packing slip. Use a circular fabric cutter and a precision digital scale. Cut a specific area of the fabric from an inconspicuous spot, like the inside of the pocket, and weigh it. Multiply the result according to the cutter's specifications to find the exact GSM.
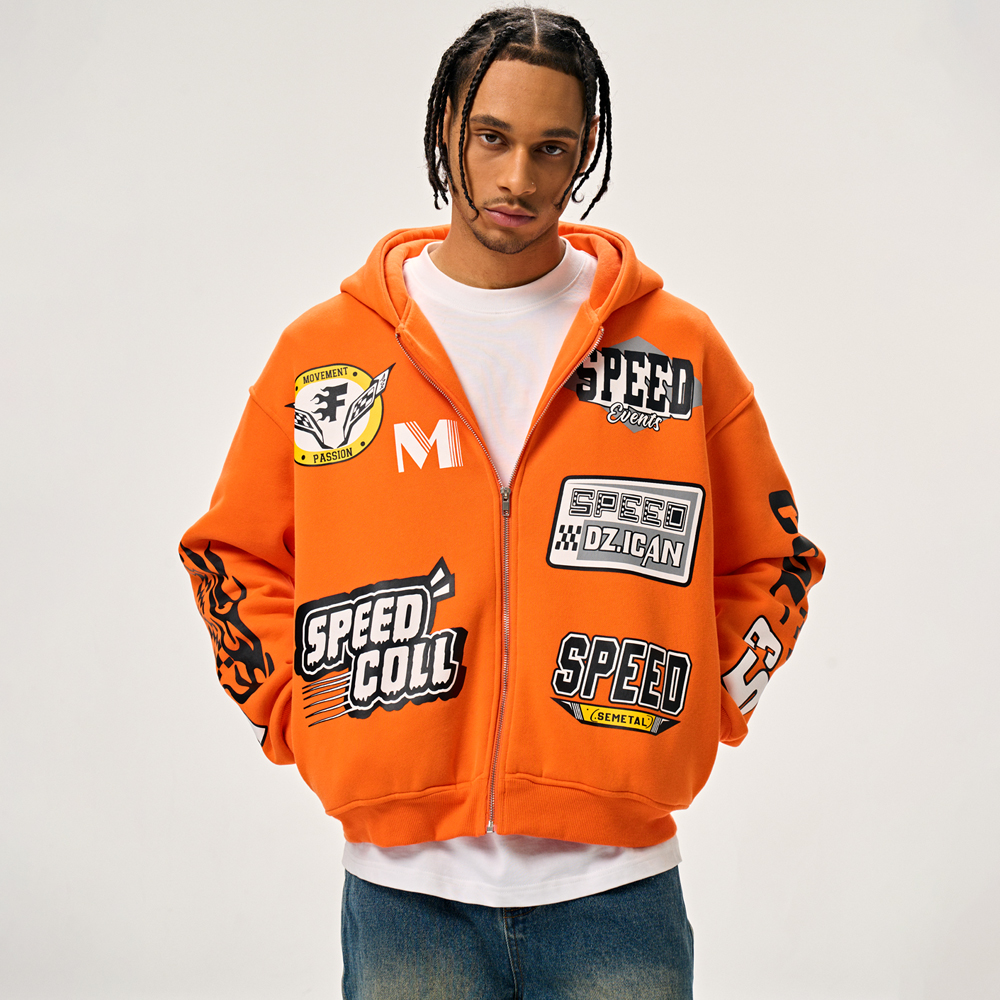
This step is absolutely critical when sourcing Heavyweight Hoodies. These garments typically range from 350 to over 500 GSM. Some manufacturers take shortcuts to fake this weight. They might apply heavy chemical stiffeners or starch to lighter fabrics during the finishing process. Washing the sample removes these stiffeners, revealing the true, lighter weight. Always verify GSM after a standard wash cycle to ensure the fabric maintains its density.
Fabric composition affects breathability, drape, and printing viability. Evaluate the exact blend used in your sample. A 100% cotton fleece feels entirely different from an 80/20 cotton-polyester blend. Polyester adds durability and reduces shrinkage, but high cotton content offers a premium hand-feel and better breathability. Verify that the factory used the exact blend specified in your tech pack by requesting a fabric composition test report if necessary.
Assess the interior finish carefully. Check if it uses French terry loops or brushed fleece. Brushed fleece provides warmth but can shed heavily if poorly manufactured. Rub the interior against a dark shirt to test for excessive shedding and pilling. French terry should feature tight, consistent loops without snagging. Loose loops indicate poor knitting tension and will catch on jewelry or zippers.
Color accuracy requires strict verification. Compare the physical sample color to your previously approved lab dips. Always conduct this visual check under standardized D65 lighting using a lightbox. Natural sunlight changes throughout the day, altering your perception of the dye. Office fluorescent lights cast green or yellow hues that distort fabric colors.
Understand the risk of dye-lot variations. The sample roll might differ slightly from the bulk-scale dyed fabric due to water temperature and chemical concentration differences in large vats. Establish an acceptable shade band with your manufacturer. This band defines the maximum allowable color deviation for the final bulk production, ensuring consistency across different sizes.
Hardware failures ruin the user experience faster than fabric issues. Audit the quality and functionality of all zippers. Ensure they meet recognized standards, such as YKK or SBS. Test the zipper multiple times. It must track smoothly without catching the surrounding fabric. Check the insertion pin and retainer box at the bottom of the zipper for secure attachment.
Inspect drawstrings, aglets, and eyelets. The eyelets must grip the fabric securely without fraying the edges or pulling through the knit. Pull on the drawstrings to test their tensile strength. Metal aglets should remain firmly attached, even under significant tension. Plastic dipped aglets should not crack or peel when bent.
Accurate measurements ensure consistent sizing across your entire size run. Lay the garment completely flat on a smooth, hard surface. Smooth out any wrinkles without stretching the fabric. Measure the chest width from armpit seam to armpit seam. Measure the body length from the high point shoulder (where the shoulder seam meets the collar) straight down to the bottom hem.
Check the sleeve length from the shoulder seam to the end of the cuff. Measure the shoulder drop across the back. Compare these physical measurements directly to your graded spec sheet. Document every discrepancy. Even a half-inch difference in the shoulder drop alters the entire silhouette, turning a standard fit into an unintended drop-shoulder look.
Apparel manufacturing involves manual labor and flexible materials, making perfect uniformity impossible. You must define industry-standard tolerances. These margins dictate the acceptable variance from your tech pack measurements. If a factory exceeds these margins, the garment fails inspection.
| Measurement Point | Standard Tolerance Margin | Impact of Exceeding Tolerance |
|---|---|---|
| Chest Width | +/- 0.5 to 1 inch | Alters the intended fit (slim vs. oversized). |
| Body Length | +/- 0.5 to 1 inch | Causes the garment to sit too high or low on the waist. |
| Sleeve Length | +/- 0.5 inch | Results in sleeves that bunch up or expose the wrists. |
| Neck Opening | +/- 0.25 inch | Restricts head movement or causes a loose, sloppy collar. |
| Armhole Depth | +/- 0.5 inch | Restricts arm movement or creates excess fabric under the arm. |
Establish strict protocols for rejecting samples. If a measurement falls outside these acceptable variances, you must flag it immediately. Do not approve a sample hoping the factory will fix it in bulk. The sample is the standard; if the standard is wrong, the bulk will be wrong.
Never approve an unwashed sample. You must launder the garment according to your own care instructions printed on the label. Use the recommended water temperature and drying method. This test reveals the true performance of the fabric and exposes hidden manufacturing shortcuts.
Measure the dimensions again post-wash. Calculate the exact shrinkage percentage by comparing the pre-wash and post-wash numbers. High-quality fleece should shrink less than 3% to 5%. Check the side seams for torquing. If the seams twist toward the front or back of the garment, the factory cut the fabric off-grain. This is a critical manufacturing defect that ruins the fit and cannot be fixed without recutting the panels.
Durable garments require high stitch density and proper thread tension. Evaluate the stitch per inch (SPI) count on major seams. A higher SPI generally indicates better durability under stress and a more premium finish. Count the stitches carefully using a magnifying glass or a ruler. Standard fleece garments require 10 to 12 SPI.
Compare the seam types against your tech pack. Check if the factory used overlock, flatlock, or double-needle coverstitch exactly where specified. Pull firmly on the seams to test their integrity. The thread should not snap, and the seam should not gape open, exposing the interior threads. Look for needle cutting, where dull needles punch holes in the knit fabric, causing runs.
Cuffs and bottom hems rely entirely on quality ribbing to maintain their shape. Test the elasticity by stretching the ribbing to its maximum width. Release it and observe the recovery. High-quality ribbing snaps back to its original shape immediately. Poor ribbing remains stretched out, wavy, and loose.
Check the color match between the main body fabric and the ribbing. Unless you specified a contrast color, these elements must match perfectly under standardized lighting. Mismatched ribbing makes the garment look cheap and poorly planned. Ensure the ribbing composition includes a small percentage of spandex or elastane for proper recovery.
Inspect the sample for common workmanship errors that factories often try to pass through. Look for puckering around the seams, which indicates incorrect thread tension or feeding issues on the sewing machine. Check for loose threads or untrimmed thread tails inside the garment, which show poor finishing standards.
Verify kangaroo pouch alignment. The pocket must sit perfectly centered and level across the stomach.
Check hood construction for symmetry. An asymmetrical hood pulls uncomfortably on the neck and ruins the drape.
Inspect the neck tape. It should lay flat without bunching, covering the back collar seam cleanly.
Examine the bartacks at stress points, such as pocket corners, to ensure they are dense and secure.
Graphics define your brand identity and require meticulous inspection. Verify the exact placement and scale of all prints. Use a ruler to measure the distance from the collar, center front, or side seams. Check the color accuracy against your Pantone references using a physical Pantone book.
Test the durability of screen prints or direct-to-film (DTF) transfers. Stretch the printed area firmly in multiple directions. The print should stretch with the fabric without cracking, peeling, or lifting at the edges. Inspect high-density embroidery for backing stability. The thread tension must be perfect, causing zero puckering on the surrounding fabric. Ensure the factory used tear-away or cut-away backing appropriately so the embroidery does not scratch the wearer.
Custom branding requires precise execution to elevate the garment. When sourcing Private Label Hoodies, inspect your custom neck tags, woven labels, and hem tags. Verify their placement and stitching quality. Crooked labels immediately degrade the perceived value of your product and signal poor quality control.
Verify that wash care labels include all legally required information for your target market. This includes the RN number, country of origin, exact fabric composition, and correct care symbols. For technical or promotional workwear, verify necessary safety certifications. Ensure the factory provides OEKO-TEX standard verification for non-toxic dyes, proving the garment is safe for prolonged skin contact.
Packaging impacts warehouse efficiency, shipping costs, and the final unboxing experience. Review the quality of the polybags. Ensure they feature the necessary suffocation warnings required by law. Check the folding method to ensure the garment arrives without excessive wrinkles or creases across the main graphics.
Verify the barcode and SKU sticker placement on the exterior packaging. These stickers must scan easily and match your inventory management system perfectly. Proper packaging ensures your garments are completely warehouse-ready upon arrival, allowing your fulfillment team to process inventory without manual relabeling.
Clear, documented communication prevents bulk production disasters. Create a comprehensive sample feedback report. Use annotated photos to highlight specific defects. Draw arrows pointing to puckered seams, incorrect label placements, or misaligned pockets. Visual evidence eliminates language barriers with overseas factories.
List precise measurement discrepancies in a clear table format. State exactly how many inches a measurement deviates from the tech pack. Update your master tech pack to reflect any approved deviations. Never rely on verbal agreements, phone calls, or casual chat messages for production approvals. Always require a formal signature or email confirmation.
Ensure your manufacturing partner maintains ethical and quality standards before authorizing bulk production. Request relevant factory certificates during the sample approval stage. Look for WRAP, BSCI, or ISO 9001 certifications. These documents indicate a commitment to standardized quality assurance and fair labor practices.
Ask for bulk material verification records. Confirm that the factory has secured the necessary fabric yardage and dyed it to match your approved lab dips. This prevents sudden delays caused by fabric shortages or dye-house backlogs after you approve the sample.
You must know when to demand a new physical sample. Use a strict decision matrix to avoid unnecessary delays while protecting quality. Approve the sample with comments only for minor tweaks. This includes changing a polybag sticker, trimming loose threads, or adjusting a label placement by a fraction of an inch.
Require a completely new physical sample for major structural or material issues. If the fit is wrong, the fabric weight is incorrect, the shrinkage exceeds tolerances, or the embroidery puckers heavily, do not approve it. Waiting for a second sample delays production by two weeks, but it saves you from receiving thousands of defective garments that you cannot sell.
Measure every dimension of the physical sample flat and compare it directly to your graded tech pack tolerances.
Perform a rigorous wash and dry test to calculate exact shrinkage percentages and check for seam torquing.
Document all visual and structural discrepancies in a formal, annotated feedback report before authorizing bulk production.
Demand a second physical prototype if the initial sample fails fabric weight verification or exhibits major fit issues.
A: Producing a pre-production sample typically takes 10 to 15 days. This timeline depends on fabric availability, custom dyeing processes, and the complexity of custom hardware or embroidery. Always factor in an additional week for international shipping and physical review at your facility.
A: A fit sample tests the pattern and sizing, often using substitute fabrics that mimic the final drape. A pre-production sample uses the exact bulk fabric, final trims, and manufacturing processes intended for your final mass production run, serving as the ultimate technical standard.
A: High-quality cotton fleece should experience no more than 3% to 5% shrinkage after a standard wash and dry cycle. Any shrinkage exceeding this margin requires pattern adjustments and grading corrections before bulk cutting begins.
A: No. Photos cannot verify fabric weight, hand-feel, stretch recovery, or true color accuracy under standardized lighting. You must physically inspect, measure, and wash the garment to ensure technical compliance and prevent bulk defects.
A: Use a circular fabric cutter to remove a small swatch from an inconspicuous area. Weigh the swatch on a precision digital scale and multiply the result according to the cutter's specifications to determine the exact Grams per Square Meter (GSM).