Views: 0 Author: Site Editor Publish Time: 2026-08-02 Origin: Site
Receiving the first fit sample is the most critical juncture in the apparel manufacturing process. It represents the physical translation of a 2D tech pack into a tangible garment. Approving a flawed sample, particularly for complex silhouettes that rely on precise proportions, directly translates to costly bulk production errors, high return rates, and brand dilution. Evaluating Custom Flared Sweatpants requires an acute understanding of pattern architecture, fabric drape, and shrinkage tolerances.
To prevent unsellable inventory, apparel buyers and brand owners must execute a rigorous, standardized evaluation of the fit sample. This guide provides a technical framework for assessing construction, pattern balance, material performance, and overall viability before authorizing bulk production. By implementing these checks, you safeguard your production run and ensure the final garment aligns perfectly with your design intent.
Pattern Balance Dictates the Silhouette: The success of the flare depends entirely on the placement of the knee break and the mathematical ratio between the thigh, knee, and hem measurements.
Material Weight Alters Drape: Evaluating the GSM (Grams per Square Meter) is critical; heavyweight fabrics hold a structured flare, while lighter blends may collapse or cling.
Branding and Decoration Require Pre-Shrink Calibration: Logos, puff prints, and embroidery must be evaluated on the sample to ensure they do not warp, pucker, or crack after the wash test.
Wash Testing is Non-Negotiable: Shrinkage disproportionately affects flared and wide-leg styles, as a loss in inseam length ruins the intended stacking or pooling effect over footwear.
Documentation Drives Revisions: Vague feedback leads to second-round sample failures. Buyers must measure discrepancies against the original tech pack using standardized points of measure (POM).
Benchmarking the sample against the initial design assets establishes the baseline for your entire production run. You must compare the physical garment to the tech pack, flat sketches, reference images, and grading size charts to verify target dimensions. Defining what constitutes a passable first sample versus a critical failure frames your success criteria. A successful sample proves the manufacturer's pattern-making competency and machinery capabilities.
The flared silhouette presents unique technical challenges. You must analyze the transition from the hip block down to the knee. Evaluating the risk of bell-bottoming—an abrupt, unnatural flare—versus a smooth, graduated flare is essential. Mitigating bulk production risks involves weighing the financial trade-offs of paying for a second or third sample round against the catastrophic cost of accepting a mediocre sample that fails in grading across different sizes.
When you pull the sample out of the package, the first step is laying it flat on a large measurement table. You need to check the resting measurements before the garment is stretched or worn. This flat measurement process requires a flexible fiberglass measuring tape. You will measure the waist (relaxed and stretched), the front rise, the back rise, the thigh (usually 1 inch below the crotch seam), the knee (typically 13 to 15 inches down from the crotch, depending on the size), and the leg opening.
Compare these flat measurements directly to your tech pack's Points of Measure (POM). Most factories operate with a tolerance of +/- 0.5 inches on major horizontal measurements and +/- 0.25 inches on smaller details like pocket placement. If the sample falls outside these tolerances, you must document the exact deviation. A thigh measurement that is 1 inch too wide will completely alter how the flare looks, as the contrast between the thigh and the hem will be lost.
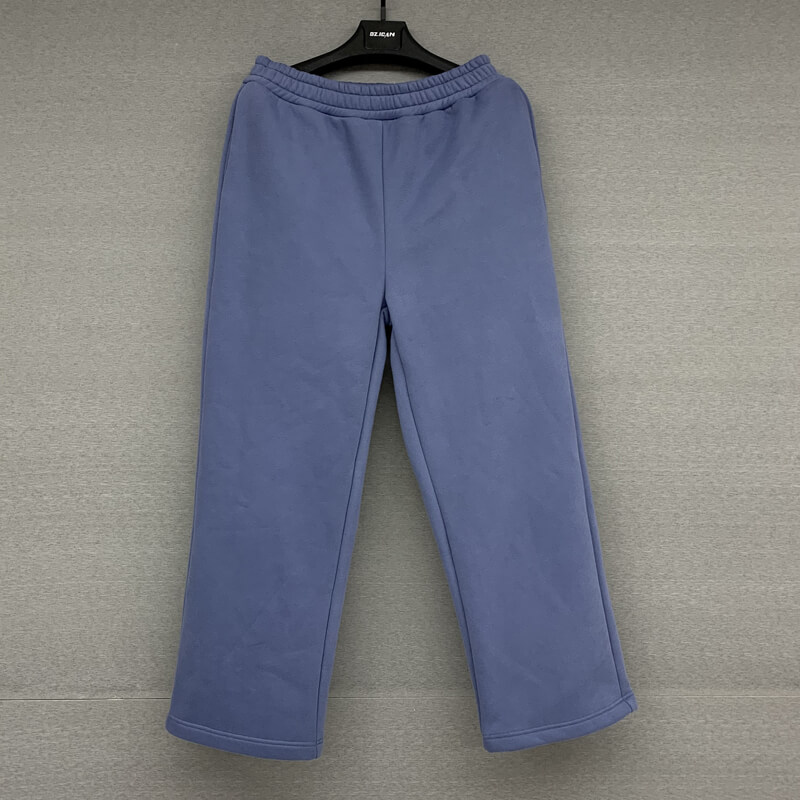
Assessing fabric weight is the first step in material evaluation. Evaluating GSM, which typically ranges from 350 to 500+ for Heavyweight Sweatpants, determines how the garment will hang. You must analyze how the fabric's rigidity supports the flared structure without looking stiff or bulky. Checking the interior finishing, whether French terry loops or brushed fleece, helps you identify potential shedding, evaluate hand feel, and ensure skin comfort.
Wash testing and shrinkage tolerance dictate the longevity of the fit. Establish a strict protocol for conducting an initial wash and dry test on the sample. Measuring the pre-wash versus post-wash inseam length reveals the fabric's stability. You should establish acceptable shrinkage tolerances, typically aiming for 3 to 5 percent for pre-shrunk cotton blends.
Color matching and dye quality require meticulous inspection. Compare the sample under standardized D65 lighting to the designated Pantone swatch. This checks for metamerism and verifies dye saturation, ensuring the color remains consistent across different lighting environments.
To properly evaluate the fabric, you need to understand the yarn composition. A 100% cotton face with a poly-cotton blend interior provides a smooth surface for printing while maintaining structural integrity. If the factory used a cheap, low-twist yarn, the fabric will pill after the first wash. Rub the fabric against itself vigorously for thirty seconds. If you see small fuzz balls forming, the yarn quality is substandard.
| Fabric Weight (GSM) | Drape Characteristics | Best Application |
|---|---|---|
| 250 - 300 GSM | Light, fluid, prone to clinging. | Lounge wear, summer collections. Not ideal for structured flares. |
| 350 - 400 GSM | Medium-heavy, holds shape well, comfortable. | Standard streetwear flares, everyday wear. |
| 450 - 500+ GSM | Rigid, highly structured, creates a pronounced bell shape. | Premium streetwear, winter collections, exaggerated silhouettes. |
The knee break and flare proportion define the garment's aesthetic. Identifying the exact Point of Measure (POM) where the widening begins is crucial. Ensure the knee measurement is not overly restrictive; a tight knee causes the fabric to bunch uncomfortably when sitting.
Pattern architecture involves analyzing inseam flares, outseam splits, and panelled inserts. You must evaluate custom flare construction types, noting whether the flare is built into the main pattern pieces or created via triangular side-panel inserts. Evaluating seam alignment and weight distribution of side inserts ensures they do not pull the leg off-center. Checking raw-edge splits or zipper-vent closures at the hem for structural reinforcement prevents tearing during wear.
Inseam length directly impacts footwear interaction. Evaluate the hem opening's circumference and test the sample with the intended footwear, such as chunky sneakers or boots. This ensures the flare falls, stacks, or pools correctly without dragging excessively on the ground.
Clarifying the pattern difference between Wide Leg Sweatpants and a true flare is necessary. Wide leg styles drop straight from the hip or thigh, whereas flares taper to the knee before expanding. Check the sample to ensure the manufacturer did not simply widen the entire leg block.
When assessing the knee break, you must look at the grading rules. The knee break cannot stay at the exact same vertical position across all sizes. A size Small requires a higher knee break than a size Extra Large. If the factory uses a lazy grading method and only scales the width without adjusting the vertical placement of the knee break, the flare will hit the calf on taller customers, ruining the silhouette.
| Feature | True Flared Sweatpants | Wide Leg Sweatpants |
|---|---|---|
| Thigh Fit | Fitted or slightly relaxed, tapering down. | Loose and relaxed from the hip down. |
| Knee Break | Distinct taper at the knee before widening. | No distinct knee break; straight drop. |
| Hem Opening | Significantly wider than the knee measurement. | Consistent width matching the thigh/knee. |
| Drape Effect | Creates a bell shape that stacks over shoes. | Creates a columnar, blocky drape. |
Waistband tension and elasticity require physical testing. Test the stretch, recovery, and tension of the waistband elastic to ensure it holds firmly without constricting. Check for twisting or rolling inside the waistband casing, which indicates poor securing stitches. Evaluate drawstring quality, exit hole reinforcement using metal eyelets or embroidered buttonholes, and overall aglet durability.
Seam integrity and stitch density prevent blowouts. Count the Stitches Per Inch (SPI) to ensure durability, aiming for 10 to 12 SPI for high-quality fleece. Check the crotch seam and inseam for reinforcement, looking for flatlock stitching or double-needle coverstitch applications.
Pocket placement and execution affect the hip silhouette. Ensure side seam pockets lay flat and do not flare out, which adds unwanted visual width to the hips. Check the pocket bag depth and material; using jersey cotton for pocket bags reduces internal bulk.
Inspect the overlock stitching on the interior seams. A 4-thread overlock is standard for sweatpants, providing stretch and durability. If the factory used a 3-thread overlock, the seams will likely pop under stress. Pull the seams apart firmly with your hands. If you can see the threads separating and exposing the interior space, the stitch tension is too loose and must be corrected before bulk production.
Stretch the waistband to its maximum capacity and release it. It should snap back to its original measurement immediately.
Inspect the drawstring exit holes. If using buttonholes, check for dense, tight stitching without fraying. If using metal eyelets, ensure they are set firmly through a layer of interfacing so they do not rip through the fleece.
Turn the pants inside out and check the crotch gusset. A diamond or triangular gusset reduces stress on the intersecting seams and improves mobility.
Measure the pocket opening. It should be at least 6 inches to comfortably fit a hand and a modern smartphone.
Check the hem finishing. A double-needle coverstitch provides a clean, professional look and allows the hem to stretch slightly without snapping the threads.
Logo and graphic application placement must align with the body's natural curves. Evaluate the scale and positioning of screen prints, puff prints, or embroidery on the thigh or along the flared leg panel. Check if leg graphics distort, stretch, or pucker when the fabric drapes or when the garment is worn.
Decoration execution and durability require close inspection. Inspect embroidery backing for scratchiness or excessive stiffness that disrupts the fabric’s natural drape. Evaluate puff print cure quality by checking for cracking, peeling, or bubbling after the initial wash test. Verify the brand label, care label, and size tag sewing quality and comfort on the inside waistband.
When dealing with puff print on heavy fleece, the curing temperature is critical. If the factory cures the print at too high a temperature, the fleece will scorch or shrink unevenly around the graphic. If the temperature is too low, the puff print will wash out or crack immediately. Perform a stretch test on the printed area. The print should stretch slightly with the fabric and return to its shape without cracking.
For embroidery, check the density of the stitches. High-density embroidery looks premium but can create a stiff, heavy patch on the fabric that ruins the drape of the flare. Request that the factory uses a tear-away or wash-away backing rather than a heavy cut-away backing to keep the embroidered area as flexible as possible.
Live model testing exposes flaws that static displays hide. Mannequins are insufficient for evaluating movement and fabric behavior. Conduct a wear test on a live fit model who matches your base size measurements perfectly.
Evaluating pattern balance in motion is critical. Watch for twisting side seams, known as leg twist, while the model walks. This indicates the fabric was cut off-grain. Assess the crotch gusset functionality during deep squats or sitting to ensure adequate range of motion without seam stress.
During the fit session, have the model perform a series of movements. Ask them to sit in a chair, walk briskly across the room, and bend over. Observe how the flare reacts. Does the hem get caught under their heel? Does the knee area bag out after sitting for five minutes? Does the waistband slide down in the back when bending over?
Take photos from the front, back, and both sides while the model is standing naturally. Do not let the model pose or adjust the pants. You need to see how the garment naturally falls. If the side seam bows outward at the calf instead of falling straight down, the pattern needs to be re-balanced.
Documenting and measuring discrepancies ensures clear communication. Create a structured fit comment document detailing every issue. Take clear, well-lit photos of the sample on the fit model, using pins or tape to indicate desired adjustments. Update the tech pack with revised measurements and acceptable tolerances.
Deciding between requesting a Pre-Production (PP) sample versus proceeding to bulk requires a strict framework. Minor tweaks can often be approved for bulk via a PP sample. However, a complete structural failure or significant pattern imbalance requires a completely new fit sample before moving forward.
When writing fit comments, be highly specific. Do not say, "Make the leg wider." Say, "Increase the hem opening by 1.5 inches total circumference. Blend the new hem measurement up to the existing knee break at 14 inches below the crotch." Provide visual aids by drawing arrows and exact measurement callouts directly onto the photos of the fit sample.
List the original POM measurement from the tech pack.
List the actual measurement found on the fit sample.
State the required revision (e.g., +0.5 inches, -1 inch).
Provide a clear photograph showing the measurement tape laid flat across the specific area of the garment.
Finalize the grading rules for all sizes based on the approved base size measurements.
Request a Pre-Production (PP) sample in the final bulk fabric to verify all requested revisions.
Establish strict quality control (QC) AQL standards for the bulk run to maintain consistency.
Document all approved fit comments and updated tech packs in a centralized file for factory reference.
A: Flared sweatpants taper down the thigh and fit closer to the knee before widening out toward the hem. Wide leg sweatpants maintain a consistent, loose width from the hip all the way down to the ankle.
A: Heavyweight sweatpants, typically ranging from 350 to 500 GSM, are ideal for flares. The heavier, denser fabric holds the structural shape of the bell without collapsing, providing a premium drape over footwear.
A: Twisting side seams usually occur when the manufacturer cuts the fabric off-grain to save material. You must explicitly instruct the factory in your revision notes to cut the pattern strictly on the straight grain of the fabric.
A: The knee break is the specific horizontal line on a pants pattern where the tapering stops and the flare begins. Adjusting the height of the knee break drastically changes the visual proportion of the sweatpants.
A: This depends on brand aesthetics. A finished double-needle hem provides a clean, durable look and adds slight weight to the bottom for better drape. A raw hem offers a distressed, vintage look but requires a stay-stitch to prevent excessive unraveling.
A: Ensure the artwork is placed on a flat section of the leg pattern, away from the knee break where the fabric naturally bunches. Request that your manufacturer use lightweight wash-away backing for embroidery on fleece to maintain the fabric's natural drape.


